retro-platform-jam 5 is about to start and I think I will give GameBoyAdvanced a try. Not sure I will finish something due to the RoomGame and the NetworkGame need some love. But I could use it to write a new renderer for RoomGame. Ok, enough blabla. Here how to setup a minimal vs-code,mGBA,debuggable,devkitpro obviously on linux.
Install devkit-pro on ubuntu/debian-based:
   wget https://apt.devkitpro.org/install-devkitpro-pacman
   chmod +x ./install-devkitpro-pacman
   sudo ./install-devkitpro-pacman

   sudo dkp-pacman -S gba-dev
This will install everything you need. In order for all the environment-variables to be set,logout and relogin.
Create a folder somewhere. And start vscode in it:
mkdir TestGBA
cd TestGBA
code .
Create a file: Makefile (following files are basically copied from here)
#
# Makefile for first.gba
#

PATH := $(DEVKITARM)/bin:$(PATH)

# --- Project details -------------------------------------------------

PROJ    := first
TARGET  := $(PROJ)

OBJS    := $(PROJ).o

# --- Build defines ---------------------------------------------------

PREFIX  := arm-none-eabi-
CC      := $(PREFIX)gcc
LD      := $(PREFIX)gcc
OBJCOPY := $(PREFIX)objcopy

ARCH    := -mthumb-interwork -mthumb
SPECS   := -specs=gba.specs

#CFLAGS  := $(ARCH) -O2 -Wall -fno-strict-aliasing
CFLAGS  := $(ARCH) -g -Wall -fno-strict-aliasing
LDFLAGS := $(ARCH) -g $(SPECS)


.PHONY : build clean

# --- Build -----------------------------------------------------------
# Build process starts here!
build: $(TARGET).gba

# Strip and fix header (step 3,4)
$(TARGET).gba : $(TARGET).elf
	$(OBJCOPY) -v -O binary $< $@
	-@gbafix $@

# Link (step 2)
$(TARGET).elf : $(OBJS)
	$(LD) $^ $(LDFLAGS) -o $@

# Compile (step 1)
$(OBJS) : %.o : %.c
	$(CC) -c $< $(CFLAGS) -o $@

# --- emu ----
emu: build
	mgba-qt $(TARGET).gba

debug-emu: build
	mgba-qt -g $(TARGET).elf

# --- Clean -----------------------------------------------------------

clean :
	@rm -fv *.gba
	@rm -fv *.elf
	@rm -fv *.o

#EOF
Create a file first.c:
// First demo. You are not expected to understand it
// (don't spend too much time trying and read on).
// But if you do understand (as a newbie): wow!

int main()
{
    *(unsigned int*)0x04000000 = 0x0403;

    ((unsigned short*)0x06000000)[120+80*240] = 0x001F;
    ((unsigned short*)0x06000000)[136+80*240] = 0x03E0;
    ((unsigned short*)0x06000000)[120+96*240] = 0x7C00;
    int result = 0;

    while(1){
        result++;
    }

    return 0;
}
Thx to J Vijn (see link)
Create Folder .vscode if not already there. And two files: launch.json and tasks.json(disclaimer: I'm always a bit lost when it comes to launch.json and tasks.json. you'll see what I mean):
launch.json:
{
    // Use IntelliSense to learn about possible attributes.
    // Hover to view descriptions of existing attributes.
    // For more information, visit: https://go.microsoft.com/fwlink/?linkid=830387
    "version": "0.2.0",
    "configurations": [
        {
            "name": "Debug",
            "type": "gdb",
            "request": "attach",
            "gdbpath": "/opt/devkitpro/devkitARM/bin/arm-none-eabi-gdb",
            "executable": "./first.elf",
            "target": ":2345",
            "cwd": "${workspaceRoot}",
            "remote": true,
            "valuesFormatting": "parseText"
        }

    ]
}
tasks.json:
{
    // See https://go.microsoft.com/fwlink/?LinkId=733558
    // for the documentation about the tasks.json format
    "version": "2.0.0",
    "tasks": [
        {
            "label": "Make",
            "type": "shell",
            "command": "make",
            "group": {
                "kind": "build",
                "isDefault": true
            }
        },
        {
            "label": "Make run",
            "type": "shell",
            "command": "make emu",
            "group": {
                "kind": "build",
                "isDefault": true
            }
        },
        {
            "label": "Make debug",
            "type": "shell",
            "command": "make debug-emu",
            "group": {
                "kind": "build",
                "isDefault": true
            }
        },
        {
            "label": "Make Clean",
            "type": "shell",
            "command": "make clean"
        }
    ]
}
Download mGBA (worked for me with 0.9.3):
https://mgba.io/downloads.html
tar xvf mGBA...tar.gz
cd mGBA...
sudo dpkg -i libmgba.dep
sudo dpkg -i mgba-qt....dep
With mgba installed you now can run your game with
make emuOr activate gdb to debug:
make debug-emuYou can also trigger both commands by using ctrl+shift+p => Run Tasks: Run tasks => Make Run or Make Debug
This will halt the emulator until you connect vscode to gdb.
- go to first.c and add a breakpoint
- go to vscode's Debug-view, select 'Debug' and hit the green arrow:
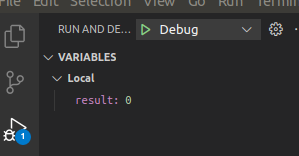
The debugger should stop at the breakpoint.
That setup might work better. E.g. the emulator could start automagically by the right vscode-(pre)command. But I just couldn't get it to run. That was the only way and it's good enough for me.
Here you can find my start template:
 GitHub
Further read:
https://devkitpro.org/wiki/Getting_Started
https://devkitpro.org/wiki/devkitPro_pacman
https://www.coranac.com/tonc/text/toc.htm
https://github.com/mgba-emu/mgba/issues/1391
https://github.com/JamieDStewart/GBA_VSCode_Basic
https://www.youtube.com/watch?v=Rj0lf46iljc
http://problemkaputt.de/gbatek.htm#gbatechnicaldata
https://forum.gbadev.org/
https://github.com/PeterLemon/GBA
https://github.com/devkitPro/gba-examples/tree/master/template