server2vm
I guess we all know the problem. We have a production server somewhere in the internet, and every change on it might have critical impact. Wouldn't it be great to have a snapshot of the current server to test everything and once everything is settled you can do the same on the production server.
Nowadays docker makes it much easier to get a predictable result, but still you need to interact from docker daemon to the server. This tutorial will show one way to:
- how to create a raw vm image to keep the server data
- how to read the data the entire data from the server
- how to convert the raw image to a VBox vdi-Image and create a VM
- how to mount the image and adjust it to be runnable in VM
- Start the Test-Server
- Sync Test-Server again to be uptodate again
Caution!! this is one possible way. I'm not a linux master and this tutorial is mainly to help me remember what I just learned. So if I do something scary, feel free to contact me.
1. how to create a raw vm image to keep the server data{.subtitle,name=eins}
# create a folder for all the backup-stuff
mkdir backup
# create a raw image big enough for the server-data(replace 10GiB to an apropriate value):
fallocate -l 10GiB -o 1024 ./backup/production.img
This raw image must be set as loop-device and partitioned
# register raw image as loop-device (/dev/loop5)
sudo losetup /dev/loop5 ./backup/production.img
# call gparted, a visual partitioon-tool
sudo gparted /dev/loop5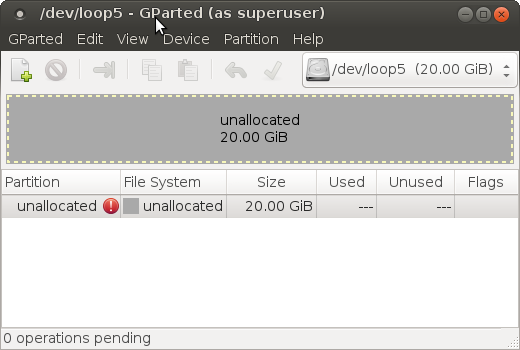
gparted
- Device->Create Partition Table(msdos)
- Partion->New...
- Leave the default values and make sure you have a linux filesystem (e.g. ext4) -> "Add"
fat or ntfs are not able to keep user/group-permissions which is absoluetly necessary - Apply
The newly created partition inside the raw-image is now accessible via /dev/loop5p1
2. how to read the entire data from the server {.subtitle,name=zwei}
# create a folder where we want to mount our partition
mkdir mnt
# mount the partition where we want to save the data from our server
sudo mount /dev/loop5p1 ./mnt
Now we are almost ready to sync with the server but we need to create an exclude-file to tell rsync what folder not to sync.
Create a file 'excludelist' with this content in the current folder:
/sys
/proc
/dev
/run
/var/lock
/var/run
/media
/var/lib/ntp/proc
/var/lib/docker
.snapshots/Before we can call rsync we have to check if the server-user we use is in the sudoers list and is able to call rsync without using password. For this ssh to the server.
localhost$ ssh serveruser@yourserver

serveruser@yourserver$ sudo vi /etc/sudoers
Make sure this line is present or added for your user:
serveruser ALL= NOPASSWD:/usr/bin/rsyncLeave the server back to localhost. Now it is time to rsync. (Again, be warned.)
sudo rsync \
    --progress \
    -zarve "ssh -C -l youruser" \
    --rsync-path='sudo /usr/bin/rsync' \
    --exclude-from /space/backup/excludelist-athlon64 \
    --delete \
    youruser@yourserver:/ \
    ./mnt

# as oneliner:
# sudo rsync --progress -zarve "ssh -C -l youruser" --rsync-path='sudo /usr/bin/rsync' --exclude-from /space/backup/excludelist-athlon64 --delete youruser@yourserver:/ ./mnt
#
What is the meaning of all those options?
| OPTION | MEANING |
|---|---|
| --progress | show what file is copied atm |
| -zarve | z=compress |
| a=archive(keep premissions and users) | |
| r=recursive | |
| v=verbose | |
| e=specify remote shell "ssh -C -l youruser" | |
| -rsync-path | how to call rsync on the server. "sudo /usr/bin/rsync" |
| You wouldn't be able to call this without NOPASSWD entry in the sudoers-file | |
| --exclude-from | specify a file where every line repesents a folder that should be excluded from the transfer |
| --delete | delete files on the target-filesystem if they are not on the server anymore |
| youruser@yourserver:/ | specify the server we want to READ the data FROM, starting from the root folder / |
| ./mnt | specify the target we we want the data to be WRITTEN TO |
| WARNING!!! Files that are already in ./mnt but not on the server at this location will be deleted! so it can result in a total wipe out!!! So you can imagine what happens if you sync an empty local folder with your server! it will be wiped(i guess, never tested it) |
The output of the call should look like that: 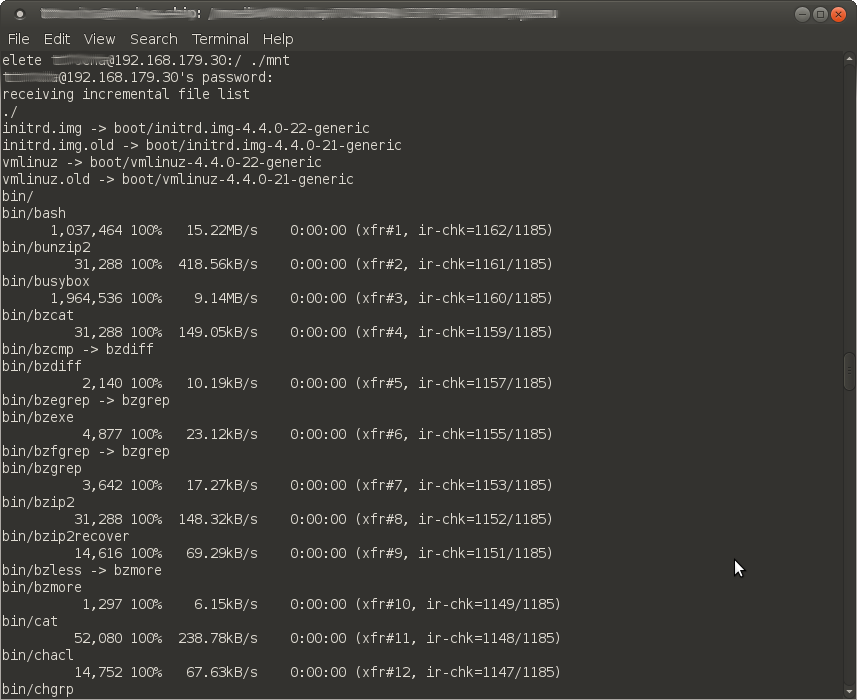
info: if we use rsync with a windows-partition in our raw-image all the permissions and ownerships of the files are lost and set to the current use which will break the server.
3. how to convert the raw image to a VBox vdi-Image {.subtitle,name=drei}
Since we want to use this raw image we just filled with the server data as hardisk of our virtual machine, we now need to transform the raw image in a VirtualBox image.
VBoxManage convertfromraw --format VDI ./backup/production.img PRODUCTION.vdiNow we need a livecd. I used ubuntu-16.04
Let's create a VM that should be our replicated server.
Start VirtualBox, press the new-Button and create a Linux-Type VM: 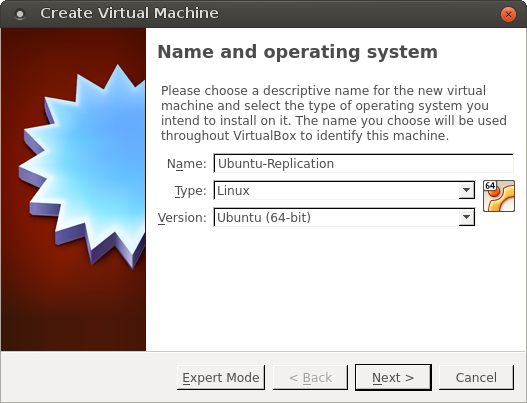
Do not create a new Harddisk but use the one we just created: 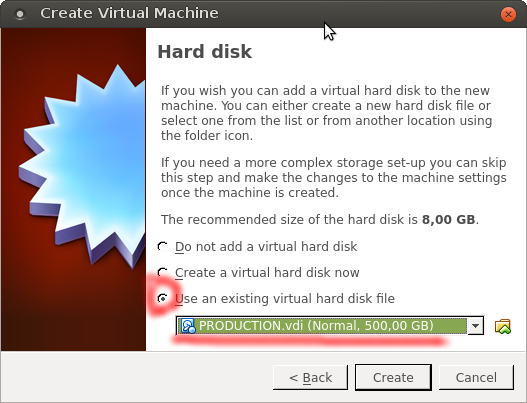
Now we need to setup the network to be bridged, so that we are in the same network as the host-computer and insert the ubuntu live-cd:
- left-click the new VM. Press Ctrl+s to open the settings
- select Network => Attached to: Bridged Adapter (keep the default settings)
- select Storage => Select the DVD-Rom in 'Controller:IDE' => Left-Click on the disc-icon and select the live-cd(dvd)
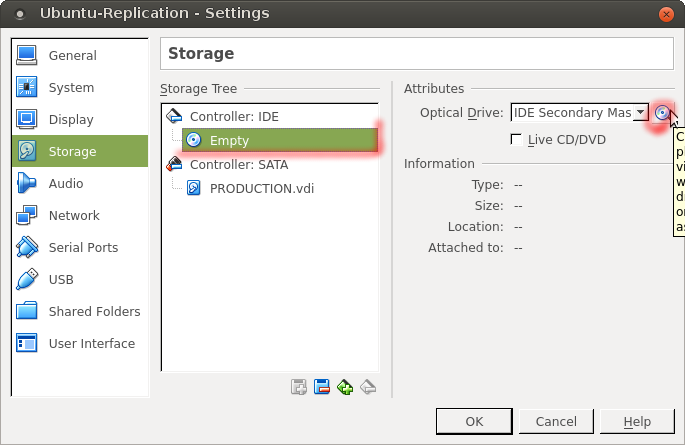
- Start the VM (right-click=>start)
4. how to mount the image and adjust it to be runnable in VM{.subtitle,name=vier}
Now we managed to start an ubuntu-live-cd with our server-image on hardisk waiting to be mounted.
Open a terminal: press ctrl+alt+t
#mount the harddisk (our image)
sudo mount /dev/sda1 /mnt
#if not already present create some 'virtual' folders:
sudo mkdir /mnt/dev
sudo mkdir /mnt/dev
sudo mkdir /mnt/proc
sudo mkdir /mnt/sys
sudo mkdir /mnt/run
sudo mkdir /mnt/root/run
sudo mkdir /mnt/run/lock

#bind some directories of our host to the location that we will chroot soon:
sudo mount --bind /dev /mnt/dev &&
sudo mount --bind /dev/pts /mnt/dev/pts &&
sudo mount --bind /proc /mnt/proc &&
sudo mount --bind /sys /mnt/sys
#now we chroot to the server-system
sudo chroot /mntNow we need to adjust fstab, since we only have one partition and the server might have another setup.
Open /etc/fstab
It should look like this. 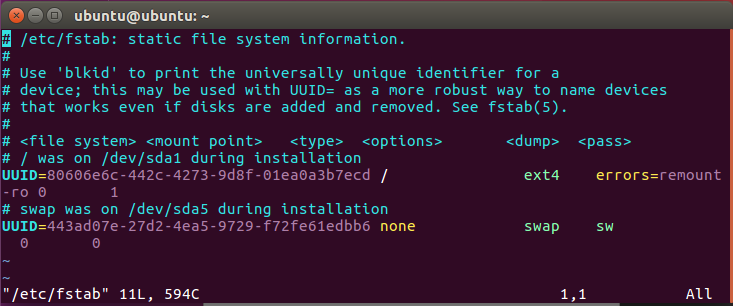
Replace the content with this:
tmpfs                    /tmp      tmpfs     nodev,nosuid          0   0
/dev/sda1                /         ext4      defaults,noatime      0   1
Since we don't have a bootloader installed on our fresh image, yet. We can do this by (re)installing grub2:
# install grub2 to the mbr of /dev/sda
grub-install /dev/sda

# deactive X, since we want to boot to console

# set grub to text-mode
vim /etc/default/grub
# replace:
# GRUB_CMDLINE_LINUX_DEFAULT="quiet splash"
# TO:
# GRUB_CMDLINE_LINUX_DEFAULT="text"
update-grub

# if using systemd, deactivate graphic bootmanager:
sudo systemctl enable multi-user.target --force
sudo systemctl set-default multi-user.target

# recreate the initramfs

# check version
ls -l /lib/modules
# use one module-folder as input(this differs):
update-initramfs -c -k 4.4.0-21-generic
5. Start the Test-Server
1. Now **shut down** the VM.
2. Remove live-cd from VM
3. Start VM
4. If everything went fine, you will be end up on the console-login:
Test-Server-Login
6. Update server
Option 1 : Update raw-image and recreate vbox-image (with the need to adjust all settings again)
First we need to mount our /backup/production.img (or however you called the raw-image)
sudo losetup /dev/loop5 ./backup/production.img
sudo kpartx -a /dev/loop5
sudo mount /dev/mapper/loop5p1 ./mnt
Now we have to call the same rsync-call as we did when we filled the raw-image the first time ( see: rsync Call )
sudo rsync \
    --progress \
    -zarve "ssh -C -l youruser" \
    --rsync-path='sudo /usr/bin/rsync' \
    --exclude-from /space/backup/excludelist-athlon64 \
    --delete \
    youruser@yourserver:/ \
    ./mnt
This will update the local image with the current version of the server.
CAUTION This will delete all files in the local image that where deleted on the server!!!
Now we need to start over creating a new vdi-Image that we can use in virtualbox.
The best case would be to rsync with the running local server-replication. but since you will have to adjust some settings like fstab or network I didn't find a better way,yet
Start over with creating a new vbox-image like seen above
Option 2 : Sync with the local server
Didn't work for me (at least not including a opensuse 13.2 => leap42.1 update)
Opensuse - Specific
If your server is opensuse based here are some command you might want to use. Plz check beforehand. This is without instruction here:
in chroot-mode with livecd
- change fstab and /etc/default/grub as stated above
- sudo mkinitrd
bash sudo grub2-mkconfig /boot/grub2/grub.cfg grub2-install /dev/sda- reboot and start server
on the VM-Server
- Check network with
bash sudo ifconfigIf there is no eth0 device you need to configure the network:
- sudo yast > system > Network-Settings
- go to the "82540EM Gigabit Ethernet Controller" (or similar) -> Edit -> Set to DHCP and DCHP4 only
- remove "Network Connector" if present
check if the dns is set right.
vim /etc/resolv.confMake sure there is one nameserver to your local router (e.g. nameserver 192.168.1.1 )
Mount an already existing raw-image
Info:
If you already have an image with its partition, you can make that accessible via kpartx
sudo losetup /dev/loop5 [IMAGENAME]
sudo kpartx -a /dev/loop5
# once you are ready using the partition you can unmap with:
# sudo kpartx -r /dev/loop5References:
https://wiki.archlinux.org/index.php/Moving_an_existing_install_into_%28or_out_of%29_a_virtual_machine http://howtoubuntu.org/how-to-repair-restore-reinstall-grub-2-with-a-ubuntu-live-cd
https://askubuntu.com/questions/16371/how-do-i-disable-x-at-boot-time-so-that-the-system-boots-in-text-mode
