jME SceneLoading with OgreImporter
UPDATED TO JME2-INCLUDED OGRE-IMPORTER
![]()


Introduction
Since I started using jME I have still the same problem! How can I create a model and export it so that jME can import it. There are some importers only able to load static models or with very simple animations and so on. Once it seems you found the right export/importer-combination it doesn’t work another time. A problem is that I am a beginner to 3D what makes all of it not even easier.
Nevertheless at the moment I use blender for creating models and getting more and more familar with it every day. In this tutorial I will show you how to model a scene in blender, export it and import it to jME with Momoko_Fan’s OgreImporter. (Thanks for that importer) Please notice that I am new to jME and Blender. I just show a way how it worked for me. For sure there are other and better ways to achieve this. If something was wrong just let me know.
getting the requirements
First of all let’s get the resources we need to finish this tutorial. Please follow the link’s instructions to get them installed
- Blender
- Mesh-Exporter-Script
- dotscene-Exporter-Script
- jME2
- jme2 ogreImporter (Ogre is included into jME from now on)
You should be familiar with blender as I won’t go too deep into how to use it! For good resources have a look here:
- Blender: FromNoobToPro
- Your First Animation in 30 plus 30 Minutes (This is great as introduction to animations! Sadly it is not possible to export the model with ogre-exporter)
building the scene in blender
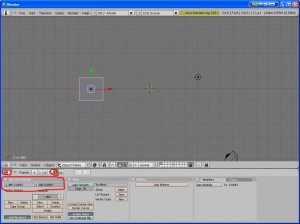
Now that you have all the tools required to get all of this done installed. Start blender. You see the normal start scene with a cube selected. Move it a bit to the left and name Mesh and Object to CUBE1(in “buttons window”->”Editing-Panel”->Link and Materials). After that it should look like this:
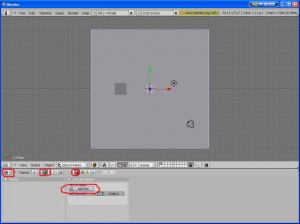
Now create a plane as our wall. For that press space (in the 3d-window) add->mesh->plane. Size it up a bit as it should represent something like a wall in our scene. Then go in the Button-Window to the Shading-Panel and use the Materials-Button. There you add a new material to the object.
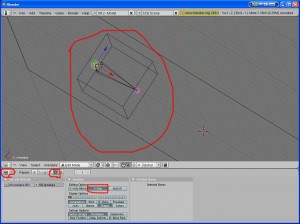
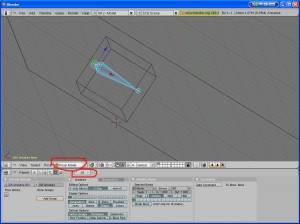
In order to make the scene a bit more interesting animate the cube. Actually I don’t know how Shape-animation works so I use a armature-based animation. Select in object-mode the cube. Press space->add->armature. A armature appears. Use in Editing-Mode F9 in the Aramture-Panel X-Ray. That let you the armature see even it is inside an object. Move the aramture (still in object-mode) to the inner middle of your cube. Change to “edit-mode” (tab) and move the end of your bone so that it looks like this:
Still in “edit-mode” select the bone (right-click) and in “ArmatureBones”-Panel look that the Selected Bones is “BO:Bone“. If not rename it to Bone again.
Change to object mode (tab). Select the cube. Go to Edit-Mode (tab). Select ALL vertices (Press A) and then CTRL-G (add select to new group). You created a vertex group. Name the it exactly like the bone that should control that vertices. (Bone).
Go to “object-mode” (tab). With the cube still select also the armature with SHIFT+RIGHTCLICK. Press CTRL-P and select in Make Parent to->Armature and afterwards Don’t create Groupes. This makes the armature the parent of the Cube.
Select (still in object-mode) the cube and choose in the Modfiers-Tab of the Editing-Panel (F9) “Make Real”
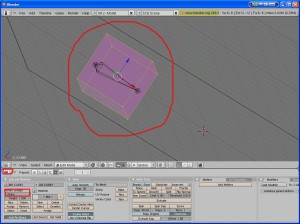
Now select the armature and go to pose-mode. With the bone selected (A) press I -> LocRot. This stores the location and rotation for the selected bones at the selected frame (usually 1). Go to Frame 20, rotate the Bone 180 degree and press I->LocRot again. That’s it!
If you had some problems with that. Just try the blender-tutorials. At the beginning blender is really hard to learn….
Here you can download the blender-file.
